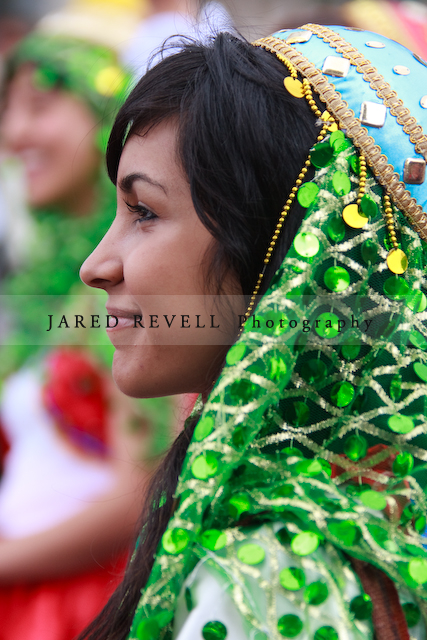
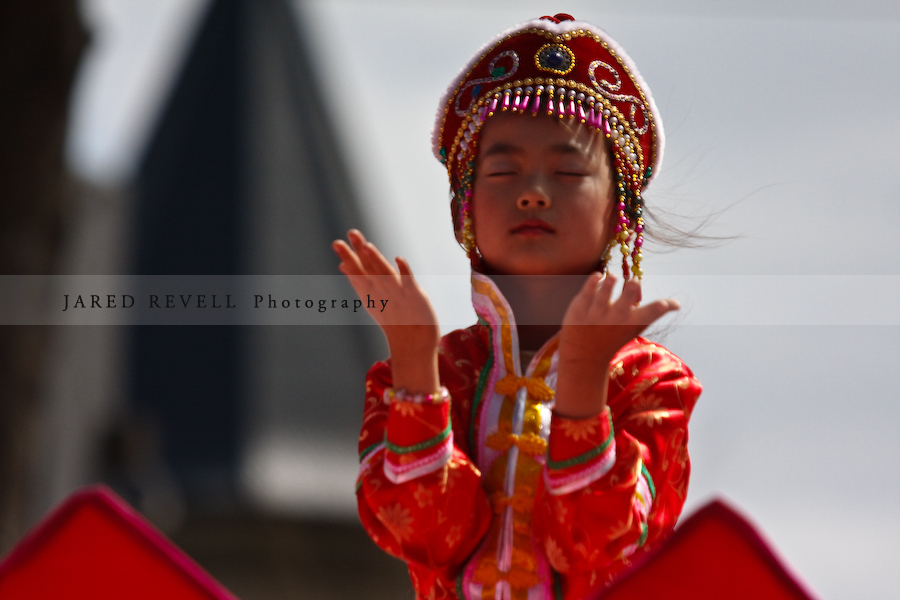
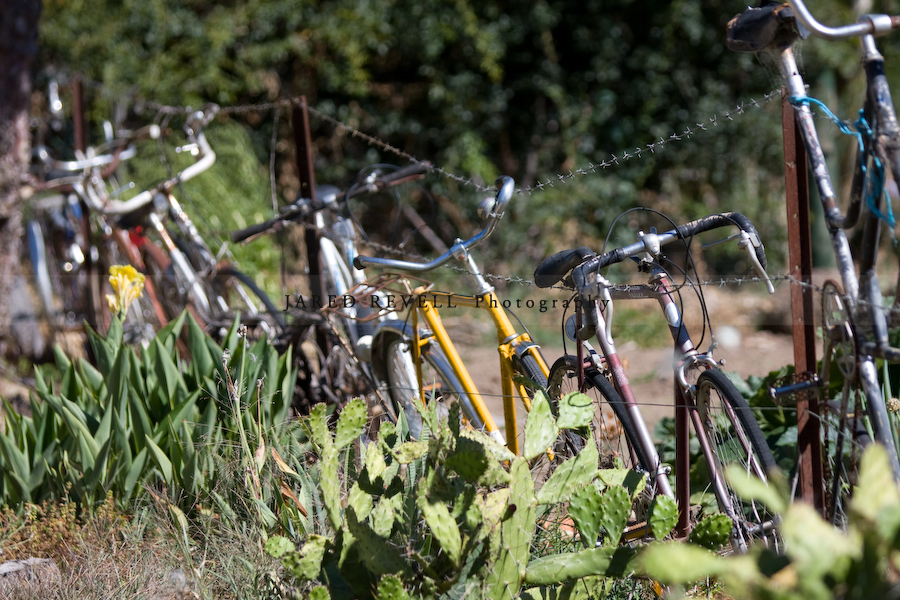
Geelong Pako Festival 2009
Saturday, February 28th, 2009
Hi Everyone,
Yesterday we photographed the Pako festival in West Geelong.
The Pako Festa is a multicultural event for the broader Geelong region. The event has performances over five stages, cultural food, workshops, art and craft exhibitions, street performers and a range of free activities for children.
 |
 |
 |
 |
 |
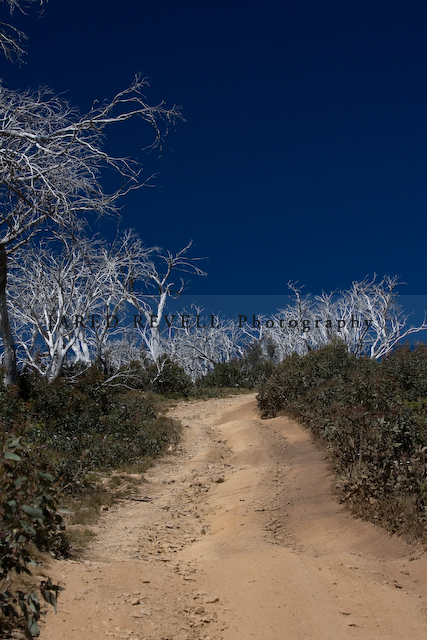
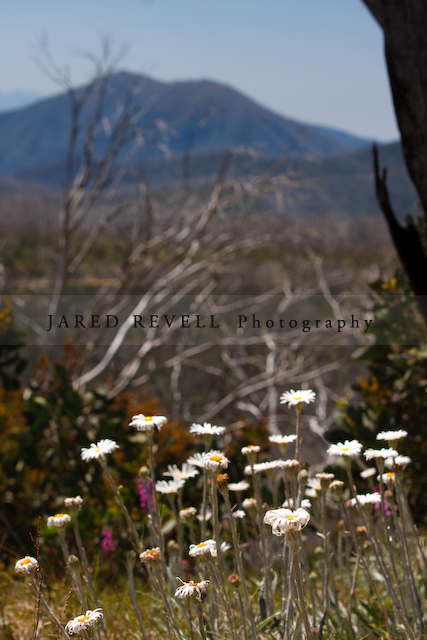
Victoria’s Alpine Region (Summer) – Landscape Photography
Wednesday, January 14th, 2009
Wild flowers come to life in Victoria’s Alpine Region during summer.
During certain times, fields are covered in them, depending on the weather conditions. This year I didn’t see endless fields, but there were plenty of flowers on show displaying their vibrant colours and hardiness.

|

|

The mountains have many tracks for four wheel drivers to attempt, and many winding roads. Mountains and valleys dominate the land in this region always provide spectacular views.
This year, the stark white trees were a reminder of the terrible bush fires that the region is prone too. But the beautiful wild flowers and new growth provided a reminder that the cycle continues and the local flora and fauna was returning.
|
|
During summer, venturing up to the peak of Mt Buffalo at sunset is definitely worth the drive. Approximately 1 hour from Porepunkah, the lookout at The Horn Picnic Area has breathtaking views. You can just sit back and watch in amazement as the sun goes down behind the ranges, colouring the sky and exposing the sheer grandeur of the region. Layers and layers of ranges can be seen in shadow.
During twilight, a walk up to The Horn is something special. At 1700m, The Horn is the highest peak at Mt Buffalo. A popular spot for rock climbers, it also offers magnificent views both during the day and at night. Make sure you bring a torch and you’re not afraid of bats or moths !

|

|

Mt Buffalo offers so much for outdoor enthusiasts. The air is fresh and the steep rising granite cliffs, grand. Wildflowers flourish in amongst the snow gums.
At dawn and dusk, keep your eye out for native animals such as wombats, wallabies and lyrebirds. With over 90km of walking tracks, summer is a great time to get outdoors and trek. Mountain biking, canoeing and swimming are just a few of many other activities on offer during the warmer months, see www.parksweb.vic.gov.au for more information.
Tumbling waterfalls aren’t as prevalent in summer, but it makes for ease of access across Eurobin Creek at the base of the mountain.
")
|

|
Accommodation is scattered all throughout the region and there are plenty of places to choose from depending on your budget. This summer, my family stayed at Ted’s High Country Lavendar Farm.
Purple covers the ground and it’s a perfect location for both couples and families. Set on a few acres, the farm offers a great getaway as well as plenty of room for kids to get up to mischief and get to know the local animals like Ted’s donkeys, chickens and sheep to name a few.

|

|

Consisting of four river basins or valleys, created by the Ovens, Buffalo, Buckland and Kiewa rivers, this region’s high altitude, hot summer days and cool nights allow its small vineyards to make distinctive wines (sourced from www.visitvictoria.com).
Wineries in the region are a perfect place to have a delicious lunch and try many of the fabulous wines on offer from the region.
During summer, Feathertop Winery’s cafe is open and offers a wonderful selection of local produce for lunch, as well as fantastic wine.

|

|
And on your return journey…keep an eye out for the never ending views, or even just interesting yards !
Star Trails
Friday, January 9th, 2009
On our recent trip to the Grampians, Neil and I did some late night star trail photography at Lake Fyans.
A few people have asked me how I did it, so I thought I’d share my information with you all.
 |
|
With digital cameras and remote shutter releases, it’s fairly straightforward to take star trail photos. I recommend taking multiple shorter exposures and merging them because digital sensors build up heat over long exposures, causing red/purple casts to appear at the edges of the sensor and ruining your shot. Using shorter exposures is a way around this.
For my photos above, the details are below.
Camera Settings
Camera: Canon 40D
Lens: EF-S 10-22mm
Focal Length: 10mm
Aperture: f4.0
ISO: 800
Shutter Speed: 30 seconds x 114 shots & 111 shots
WB: Auto White Balance
Format: RAW
Tripod
Remote shutter release cable
Drive mode: Continuous shooting (burst)
Focus point on the tree (using a torch to illuminate the tree to get the focus point)
Processing
Step 1: (RAW file adjustments to all 114 shots)
Exposure adjustment: +0.9 (to get the exposure level I was after)
Exported the 114 shots as JPEG
Step 2: (Merging photos)
There are a couple of methods of doing the photo merging.
Achim Schaller has written a wonderful Startrails Application to merge all exposures into one JPEG.
It also can create a time-lapse movie ! (see mine below)
Another method is to use Photoshop and combine all layers using “lighten” merging. A handy and time saving method is to use Chris Schur’s Photoshop action.
Step 3: (JPEG Adjustment)
Sharpening (50%)
Noise Reduction (100% colour & luminance)
Celestial Positioning
Depending on what effect you are after, compose your shot accordingly.
For my photo above, I composed the shot using the south celestial pole (see image below sourced from wikipedia) which give the circular effect.
The north and south celestial poles are the two imaginary points in the sky where the Earth’s axis of rotation intersects the imaginary rotating sphere of stars called the celestial sphere. The poles appear directly overhead to an observer at the North and South Pole’s.
For those living in the southern hemisphere, there are a few methods to find the south celestial pole.
Southern Cross Method
The south celestial pole can be located from the Southern Cross and its two pointer stars.
Looking up at the Southern Cross, draw an imaginary line from the two stars at the extreme ends of the long axis of the cross and follow this line through the sky. You can either go four and a half times the distance of the long axis on the Southern Cross in the direction the narrow end of the cross points, or join the two pointer stars with a line, divide this line in half, then at right angles draw another imaginary line through the sky until it meets the line from the Southern Cross. At this crossing point is the south celestial pole.
Magellanic Clouds Method
Using the Magellanic Clouds clouds in the southern sky, make an equilateral triangle, the third point of which is the south celestial pole.

Compass Method
Using a compass, locate true south and point up to an angle equivalent to your latitude.
For example, if you were in Melbourne CBD (-37.814056,144.96168), then using your compass facing true south and looking up at an angle of 37.8° will give you the south celestial pole.
Celestial Movement
Below is a compiled video of all of my 114 exposures from Lake Fyans in the Grampians, showing the celestial movement around the south celestial pole, located at the end of the tree’s branch. (Thanks to “Achim Schaller” for this wonderful application).
You’ll notice too that the light seems to fade on the lake and the tree goes in shadow. This was because the moon was behind us and was fading to the horizon over the hour of exposure. Also the bright light appearing across the lake at the end of the sequence was a car.
For a great article on Night Sky Photography from NightSkyPix, showing it’s not that difficult to get into the hobby, see this link:
How To Photograph Star Trails – We Show How Easy It Can Be To Capture Your First Star Trail Photo
White Balance
Friday, January 9th, 2009
I did some White Balance (WB) testing with my Canon 40D to confirm and answer a question I had;
Does it matter what WB I shoot in with RAW ?
Below I provide some information on WB and step through my test results.
Information About White Balance
As we all know, photography is about light. Correct white balancing is about getting the white light right.
Our eyes are good at judging what is white under different light sources, so a white object looks white no matter what type of light we are in. However, digital cameras have difficulty with Auto White Balance (AWB). We therefore need to tell digital cameras how to interpret the colour of light so it produces the most natural looking colours in a photo. By selecting a certain WB, the software in the camera adjusts the colour temperature to make those white areas look white in the photo.
An incorrect WB can create incorrect color casts, which are unrealistic and unnatural. Understanding digital WB can help you avoid incorrect color casts created by your digital camera’s auto white balancing.
A digital camera’s AWB may obtain the correct white balance, but not all the time. So it’s important to recognise the light you are in and adjust the WB accordingly.
Proper camera WB needs to take into account the color temperature of a light source, which refers to the relative warmth or coolness of white light. Examples of WB are tungsten (lighting from warm incandescent globes), Daylight (light from a sunny day outdoors), etc.
Cameras allow you to select the WB, giving you the freedom to get close to the correct colour temperature of the light you are in. This process will remove the unrealistic color casts so objects which appear white in real life will be white in your photo. Some cameras allow you to manually select the exact colour temperature by photographing a white object and recording that data to use as a custom white balance.
In some situations you may need this WB to be very accurate. For example, fashion and advertising photography where a designer will want the colours accurately recorded. And portrait and wedding photography where accurate skin tones are necessary. In these cases the use of a target and custom white balance may be essential because the WB selections available in camera are only approximations.
The table below is taken from the Canon user manual, showing the approximate colour temperatures for certain lighting.
| White Balance Mode | Colour Temperature (Approx. K (Kelvin)) |
| Auto | 3000-7000 |
| Daylight | 5200 |
| Shade | 7000 |
| Cloudy, Twilight, Sunset | 6000 |
| Tungsten light | 3200 |
| White fluorescent light | 4000 |
| Flash | 6000 |
The chart below shows the path that a black body color will take as the black body temperature changes. Lines crossing the locus indicate lines of constant correlated color temperature. (for a technical explanation, see the source from wikipedia).
In layman’s terms, the chart shows the colour cast of a certain light temperature.
Eg; Tugnsten light (approx 3200K) is a warm light and has a yellow cast, the chart shows it will follow a path having a yellow colour.

Now for Some Test Results
Getting back to the question,
Does it matter what WB I shoot in with RAW ?
The first 3 test photos shown below are taken with the same settings, on a cloudy evening at sunset, but for each photo, a different WB was used. You can see the obvious difference in colour.
Test Photos – Different WB, Displayed “As Shot”
 |
 |
 |
| Cloudy | Tungsten | Fluorescent |
I modified the temperature of the RAW images during post processing to check if shooting in a certain WB had any effect. The 2nd set of RAW images below, are the same photos shown above, but set to “Cloudy” WB set during post processing.
 |
 |
 |
| Shot @ Cloudy, WB set to Cloudy | Shot @ Tungsten, WB set to Cloudy | Shot @ Fluorescent, WB set to Cloudy |
You can see that the colour temperature is identical in all 3 RAW images.
Conclusion
Benefits of Shooting in RAW
Results show that the best white balance solution is to shoot using RAW.
This allows you to set the WB after the photo has been taken, not having to worry about setting the WB on shoot.
However, some people like to shoot in JPEG, (i.e if they are restricted with space, or want to easily transfer photos or don’t have the time to post process), and some people don’t have a choice to shoot in RAW if their digital camera does not support it. In these situations, WB selection is essential for good, realistic results.
It may also be essential to get the WB right on shoot as mentioned above (e.g. fashion and advertising photography and portrait and wedding photography) where the colours and skin tones need to be accurately recorded.
So, if you can, always shoot in RAW to take advantage of the benefits and it is probably also good practice (depending on your situation) to set the WB correctly and get it right first.
Website Launched
Sunday, December 14th, 2008
Hi Everyone,
My new website is now launched !!
My homepage photo is titled ”Unknown”, one of my favourite photographs.

“Unknown” – Campbells Cove, Werribee South beach at dawn
Cape Schanck, VIC – Seascape
Sunday, November 30th, 2008
I was down at Cape Schanck on Victoria’s Mornington Peninsula with Neil, Rob & Simone, plenty to see and photograph.
Below is a track of our hike over the 6 hours we were there and one of many photos.
 |
 |
Me as The Intrepid Photographer
Saturday, November 1st, 2008
🙂
intrepid
adjective
invulnerable to fear or intimidation; “audacious explorers”; “fearless reporters and photographers”; “intrepid pioneers” [syn: audacious]
WordNet® 3.0, © 2006 by Princeton University.
Yep, we’ve been at it again….the things we do ~ but boy it’s fun !!
Neil, Lee and I went to the ocean beach again for sunset shots on the rocks….and Neil has posted a fantastic shot of me as the waves were crashing in over the rock shelf that you’ve got to see…
“The Intrepid Photographer 2” by Neil Boucher

The Things We Do For That Shot !
Thursday, October 23rd, 2008
Yep, it’s me….well it was me… 🙂
…with the remote shutter release @ Cowrie Beach on Phillip Island.
A good reminder to be careful when you’re on the coast for the unpredictable waves.
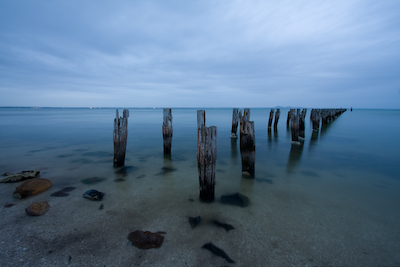
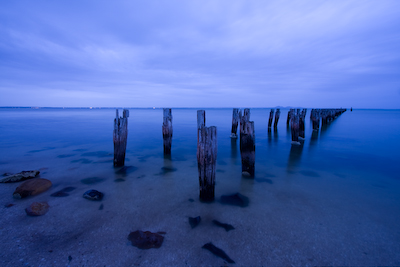
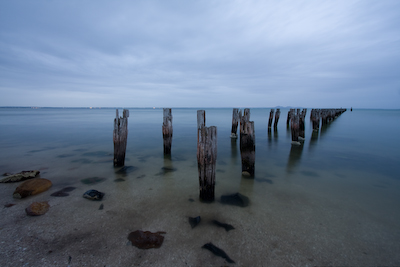
Recovering Your Deleted Photos
Monday, September 1st, 2008
Hi Everyone,
Just wanted to share some knowledge and the ‘how to’ for those who didn’t realise how you can recover your deleted images off your memory cards.
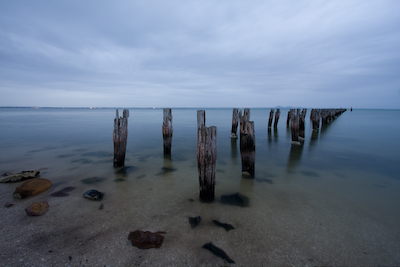
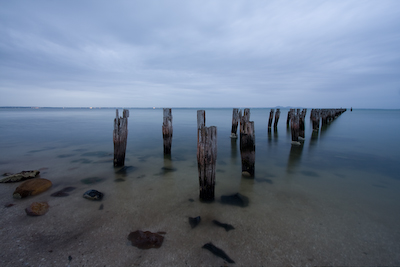
On the weekend I stupidly, but accidentally deleted my early morning long exposure photos off my 8GB CF card, including my ‘Point Lonsdale Pier at Dawn’, but here it is recovered:
 |
 |
Best practice I’ve found (learning from mistakes) is summed up here:
1. Format your memory card before any shoot, that way you’ll start from a clean/empty card and you won’t have to worry about going back and deleting old images (and then delete the wrong ones like I did)
2. If you do accidently delete your shots, don’t stress, remove your memory card from your camera straight away – this is the most important part – don’t take any more shots on that memory card – you could overwrite your deleted photos.
3. There are many programs you can download (most you have to pay for), but you can download a freeware program called “PC Inspector Smart Recovery” from Snapfiles here
For those with SanDisk Extreme memory cards, SanDisk distributes software with their Extreme media called ‘RescuPRO’ which can also be used to recover your files. Pays to check out the little disks that come with your memory cards…who would have thought ! 🙂
4. Install and recover !
Other Notes
———————-
* I’d also recommend installing the software on your laptop, so if your on the road/away you can recover on the go and not wait till you get home
and
* Take a spare card with you so you can still keep shooting.
Hope this helps !
Jared

St Pauls Beach – Sorrento
Sunday, August 31st, 2008
St Pauls Beach photo shoot with Neil.
St Pauls beach is accessible via St Pauls road in Sorrento, VIC.
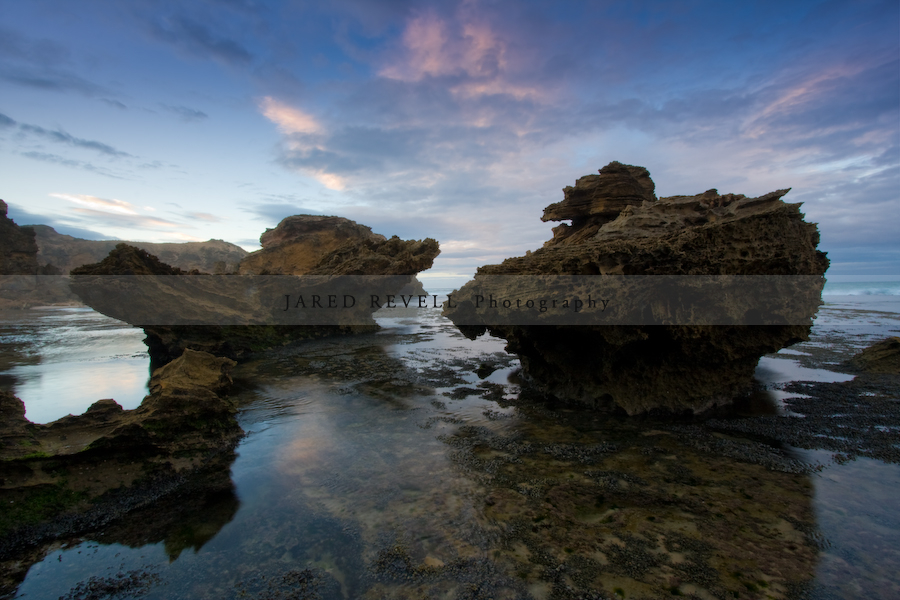
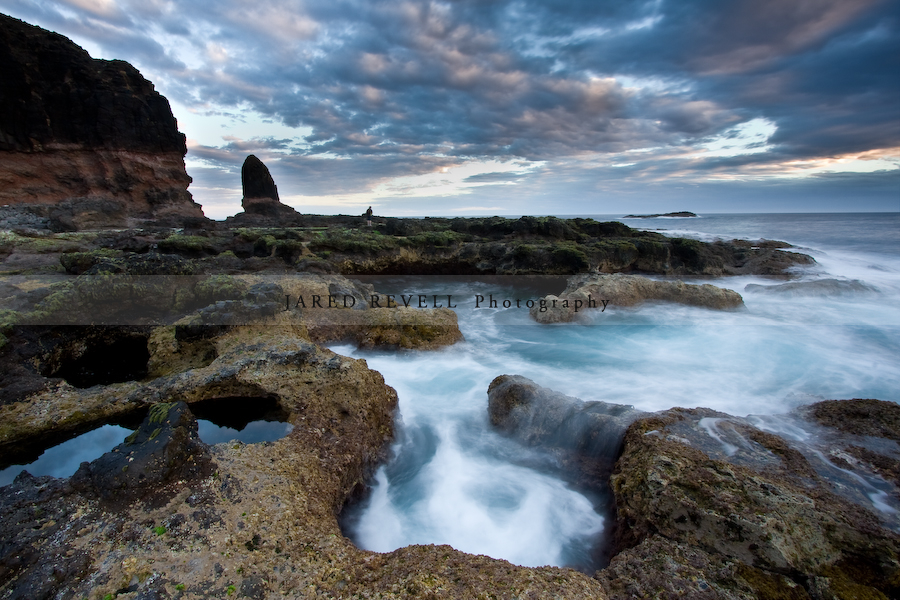
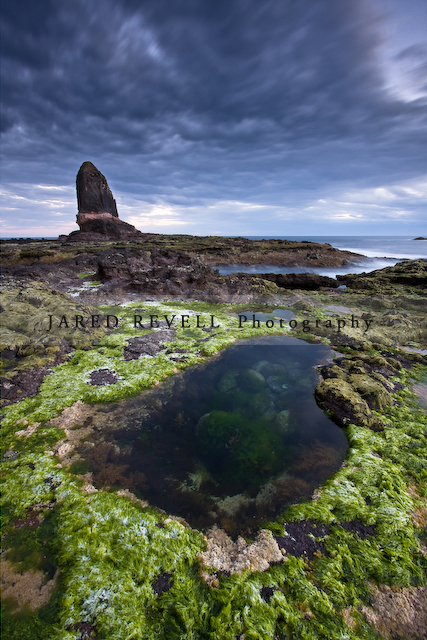
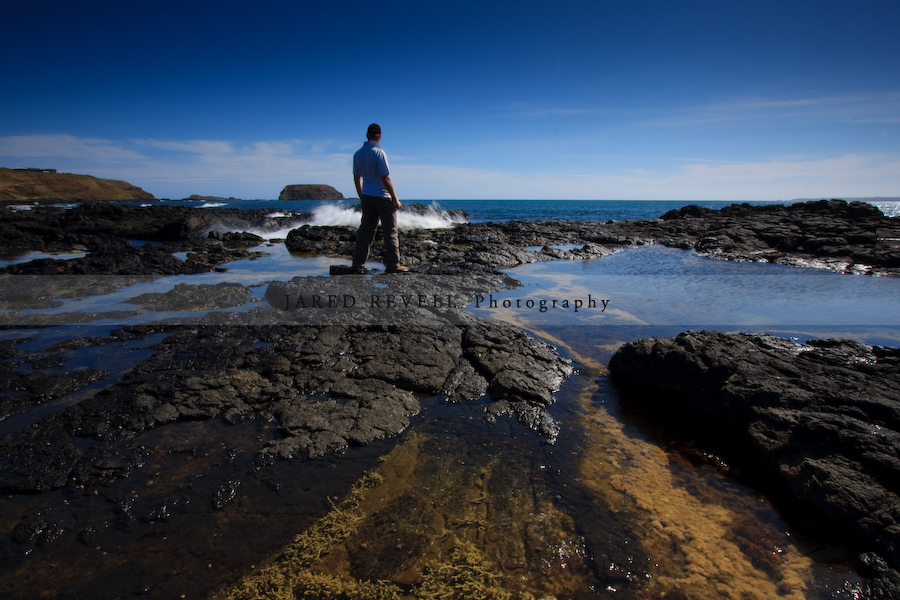
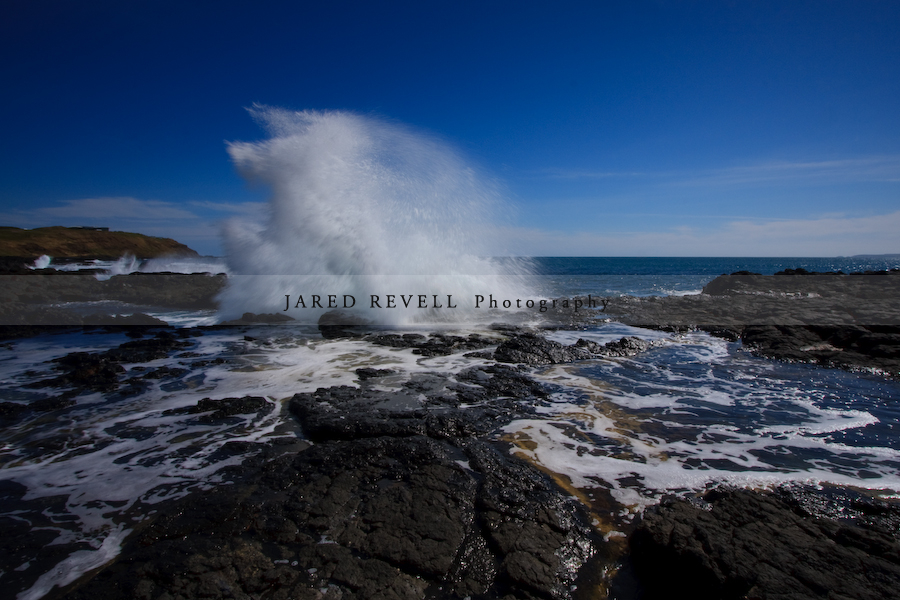
Bridge Water Bay – Blairgowrie
Saturday, August 30th, 2008
Bridge Water Bay Photo shoot with Neil.
Off St John Woods Road in Blairgowrie, VIC.
This is not the easiest and accessible place to go, but boy it’s worth it.
The rocks are so sharp – if you go, make sure you wear your waterproof hiking boots and be prepared to climb !
 |
 |
Sorrento Trip (The Intrepid Photographer)
Saturday, August 16th, 2008
Hi Everyone,
If you’ve got a sec, you can check out Neil Boucher’s shot of me in action down at Sorrento, VIC over the weekend – just after I went knee deep in the water hole !
We had a great weekend, and boy were there some amazing rock formations and sea scapes to see !

“The Intrepid Photographer” by Neil Boucher